May Peace be your gift at Christmas and your blessing all year through! ~Author Unknown


 I must admit I had this idea a month or so ago (the Christmassy stuff in shops must have stimulated my brain back then), so I have prepared – I’ve collected lots of watermelon seeds, that have dried nicely and it’s really hard to stick a needle through them now!
 If you want to try this out all you need is seeds (any chunky ones should do, just make sue they are soft and not dried, this should help you to avoid little holes in your fingers), little beads, a needle and some thread. Also some paint, that you could make your garland look gold.
 I promise I will post some more photos so that you could see what the garland looks like on the tree. Meanwhile I’ll continue trying to stick my needle through the dried seeds… as it’s not going as fast as I would hope it to be…
 It turns out it’s not that hard, but you need to be patient. I’m using a lid from a shoe box – made small carvings at each end where the threads go and then just work with a needle.


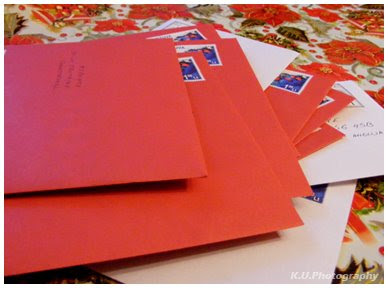
Yesterday I decided to pull myself together and at least sort out the Christmas cards (on several blogs I noticed I’m not the only one, who still hasn’t done this – it’s not nice, but knowing that the others are also experiencing stress encouraged me!). Anyway, I was really glad that at least the cards and post stamps were bought last month. So I made a list of friends who deserve a card, tried to write something personal for each of them, licked the stamps, placed them nicely on the envelopes, added addresses – I felt I was working in a factory! Then suddenly I realized that one of my friends has moved to another place and I haven’t got her address… After remembering that she has sent me a card and that the new address would be on the envelope I just put her and her boyfriends name ‘Jurate and Paulius’, thinking that I will add the rest of the information in the morning. Now have a guess – did I remember this?
Oh, no! It wasn’t until I got a text from this friend when it suddenly daunted on me that a red envelope that says ‘for Jurate and Paulius’ will never reach its destination… By the way, the text arrived after about 45 minutes after I’ve put the envelopes into the yellow post box (yes, in Lithuania they are bright yellow). So how daft is that? I bet it’s 10 out of 10! I then also remembered an advert for post services that I’ve seen in some magazine – ‘we always deliver your mail, unless it doesn’t depend on us’ and it had several photos of envelopes: some with illegible addresses and one with just ‘for grandma’ written definitely by a child on it.
So here I am, encouraged by someone else’s stress, talking photos of my Christmas cards that are ‘done’, so that I could brag about this, and later on feeling completely disorganized…

Last summer I was asked to become God mother to my nephew and had to buy a candle for his Christening. I wanted to decorate it in small white beaded flowers. As I had never done this before I looked up on the internet and found an example of something I had in mind on this website - http://www.craftbits.com/
For this project you will need: small red, green and yellow beads, thin flexible wire and a bit of patience.
 Instructions: We’ll have to make several red and several green petals – as many as you want. So here we go - cut a length of wire around 30cm for each petal. Thread a single bead onto the wire and slide it into the centre. Push one end of the wire through two more beads. Push the other end of the wire through the same two beads. Now you have the second row of your petal. Work the other rows adding one bead more than the previous row or one bead less – that’s how you can shape your petals.
Be creative – petals don’t have to be exactly the same, some can be bigger, the others smaller. You can also vary the colours – add green beads to the red petals to make your flower look more natural. If you want your poinsettia to be yellow in the middle just finish a few petals making the last petal bead yellow. After you’ve added the last bead just twist the two wires together making stems. Once you’ve made all of your petals twist their ‘stems’ into one. That’s it.
I hope you enjoyed it and that you will find a place for your ‘home grown’ poinsettia – decorate your presents, wreaths, Christmas table…


